I was digging around the APIM policies recently and came across authenticate-managed-identity (docs) and started to experiment, this blog post is the culmination of those experiments.
API Management, I have written about a couple of times but a great high level overview can be found here by Chris Reddington. Managed Identities are essentially a user assigned to API Management. These users can then be assigned permissions to work with other Azure resources via the Role Based Access Controls (RBAC). A simple example of Managed Identity at work with API Management is loading Named Values from Key Vault. The APIM Managed Identity needs to have permissions to access the vault.
The authenticate-managed-identity policy allows you to retrieve an access token using the APIM Managed Identity to call other resources. There are 2 ways this can work..
authenticate-managed-identitycan store the access token in a context variable for use in multiple requests.authenticate-managed-identitycan be used as part of asend-requestpolicy to automatically get a new access token and populate the “Authentication” header of the request.
Lets stick with Option 2 for now, in each of these cases I am going to assume the APIM already has a Managed Identity configured (help can be found here).
API Management calling the Azure Resource Manager API
The Azure Resource Manager (ARM) Rest APIs give you control over all azure resources. Chances are if you have used an ARM template, Bicep, Powershell, CLI or even Terraform to query or deploy resources to Azure you have used this API (albeit abstracted!).
I am going to use this API to list the resources in a given resource group but you could use this technique to deploy new resources in response to an API call (assuming the permissions are correct).
Lets start with those permissions, we are going to need to grant the Reader permission to our Managed Identity. In the Azure Portal this can be done by selecting the target resource group, and then Access Control (IAM) then Add Role Assignment. Your Managed Identity should have the same user name as your APIM instance.
Now we add the APIM policies, I am doing everything in the inbound section (effectively short circuiting the backend) but the policy will work just as well in the outbound section too.
First we send the request…
<send-request mode="new" response-variable-name="resourcedata" timeout="10" ignore-error="true">
    <set-url>https://management.azure.com/subscriptions/{{subscriptionId}}/resourceGroups/{{resourceGroupName}}/resources?api-version=2021-04-01</set-url>
    <set-method>GET</set-method>
    <authentication-managed-identity resource="https://management.azure.com" />
</send-request>
The request I am ultimately going to call is the GET request to List By Resource Group (defined here)
The response will be stored in a context variable called resourcedata.
I have used Named values to hide the subscriptionId and the resourceGroupName
<authentication-managed-identity resource="https://management.azure.com" />
This is the magic bit, this will make a request to Azure AD to get an access token for the managed identity and add an Authorization: Bearer <accesstoken> header to the request.
Now we do some filtering and return a response back.
<set-variable name="resourcedatafiltered" value="@("[" + String.Join(",",(((IResponse)context.Variables["resourcedata"]).Body.As<JObject>())["value"].Select(r=>String.Concat("\"",(string)r["name"],"\"")).ToArray()) + "]")" />
    <return-response>
        <set-status code="200" reason="Successful" />
        <set-body>@(((string)context.Variables["resourcedatafiltered"]))</set-body>
    </return-response>
This ugly bit of code takes the response from the api and extracts only the resource names from it and builds a json array (there must be an easier way of doing this, open to suggestions!).
Send a message to a Service Bus via a Policy
This works in a very similar way to the above, the key bits are that the managed identity will need to be assigned the Azure Service Bus Data Sender role to the queue (or topic). The API used can be found here. The completed policy then looks like this…
<inbound>
    <base />
    <send-request mode="new" response-variable-name="keyvaultdata" timeout="10" ignore-error="true">
        <set-url>https://{{servicebusnamespace}}.servicebus.windows.net/{{queuePath}}/messages</set-url>
        <set-method>POST</set-method>
        <set-header name="Content-Type" exists-action="override">
            <value>application/atom+xml;type=entry;charset=utf-8</value>
        </set-header>
        <set-body template="liquid">
			{
                "name" : "test"
            }
		</set-body>
        <authentication-managed-identity resource="https://servicebus.azure.net" />
    </send-request>
    <return-response>
        <set-status code="200" reason="Successful" />
    </return-response>
</inbound>
Note the resource type used in the authentication-managed-identity policy and the servicebusnamespace and queuePath loaded from Named values. One gotcha here is the Content-Type header which tripped my up until I read the API documentation more closely!
Write to a Blob file from Policy
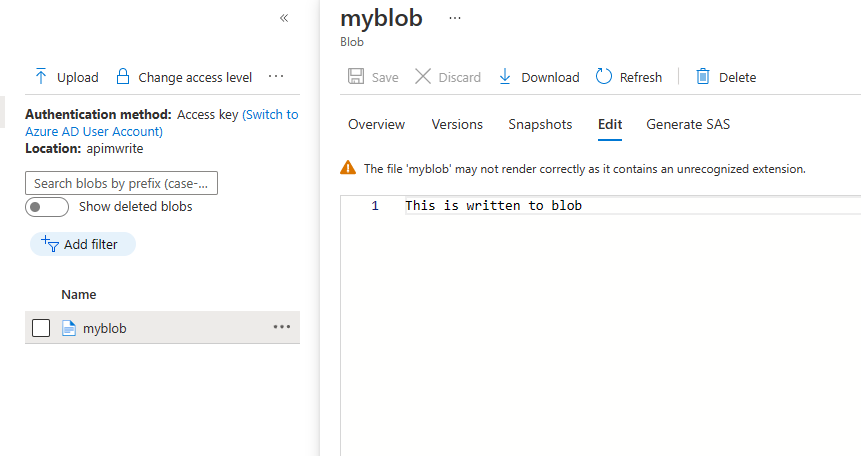
Last example is writing to a blob file the the Blob Rest API. The RBAC role I have used here is Storage Blob Data Contributor on the container.It won’t surprise you by now to discover that the pattern is largely the same.
<inbound>
    <base />
    <set-variable name="blobdata" value="This is written to blob" />
    <send-request mode="new" response-variable-name="storagewritedata" timeout="10" ignore-error="false">
        <set-url>https://{{blobstorageaccount}}.blob.core.windows.net/{{blobcontainer}}/myblob</set-url>
        <set-method>PUT</set-method>
        <set-header name="x-ms-date" exists-action="override">
            <value>@(DateTime.UtcNow.ToString("r"))</value>
        </set-header>
        <set-header name="x-ms-version" exists-action="override">
            <value>2020-10-02</value>
        </set-header>
        <set-header name="x-ms-blob-type" exists-action="override">
            <value>BlockBlob</value>
        </set-header>
        <set-body>@((string)context.Variables["blobdata"])</set-body>
        <authentication-managed-identity resource="https://storage.azure.com/" />
    </send-request>
    <return-response>
        <set-status code="200" reason="Successful" />
    </return-response>
</inbound>
Change the resource type in authentication-managed-identity policy, load in some configuration from Named values, add the required headers (in the right format, see the date header!) and we have a file written to storage.

and there’s more
There are a couple of other resource types that are interesting and need further investigation.
The Graph API provides access to user and device data from Microsoft 365 (within your tenant).
The Azure SQL API provides access to database configuration and management (at an azure resource level, you aren’t going to be executing TSQL statements here)
Finally, if you have your own Azure AD application you can call that using the APIM managed identity.
<authentication-managed-identity resource="Client_id_of_Backend"/>
